目前撲克牌遊戲網站都是在自己的電腦用npm run dev啟動,今天會介紹如何部屬Vue專案到CloudFlare提供對外連線的網站,操作有誤的地方再請多多指教。
使用Github Aciton建立
以下的操作需要事先註冊Cloudflare的帳號 和GitHub的帳號
第0步 建立CloudFlare Page的Project
我是參考這個YouTube影片學習如何建立Cloudflare Page專案,
但跟影片不同的部分我在1:56我是選only-select-repositories選擇單一Repo的權限並命名專案名稱ithelp-game-test。
影片看到5分鐘的時候,
Cloudflare網站本身停止回應,後面的步驟就沒跟著影片教學做,後面第1~3步驟是我一步步看文件試出來的並非完全照官方建議走,因為需按專案本身調整。
第1步 建立 Cloudflare API Token
參考Cloudflare Pages GitHub Action說明以下只是我再額外自己截圖實作的步驟。
- 登入帳號來到
Cloudflare的儀表板,先點選左下角的Workers & Pages - 接著點擊右手邊連結
Manage API tokens進入管理API Token的頁面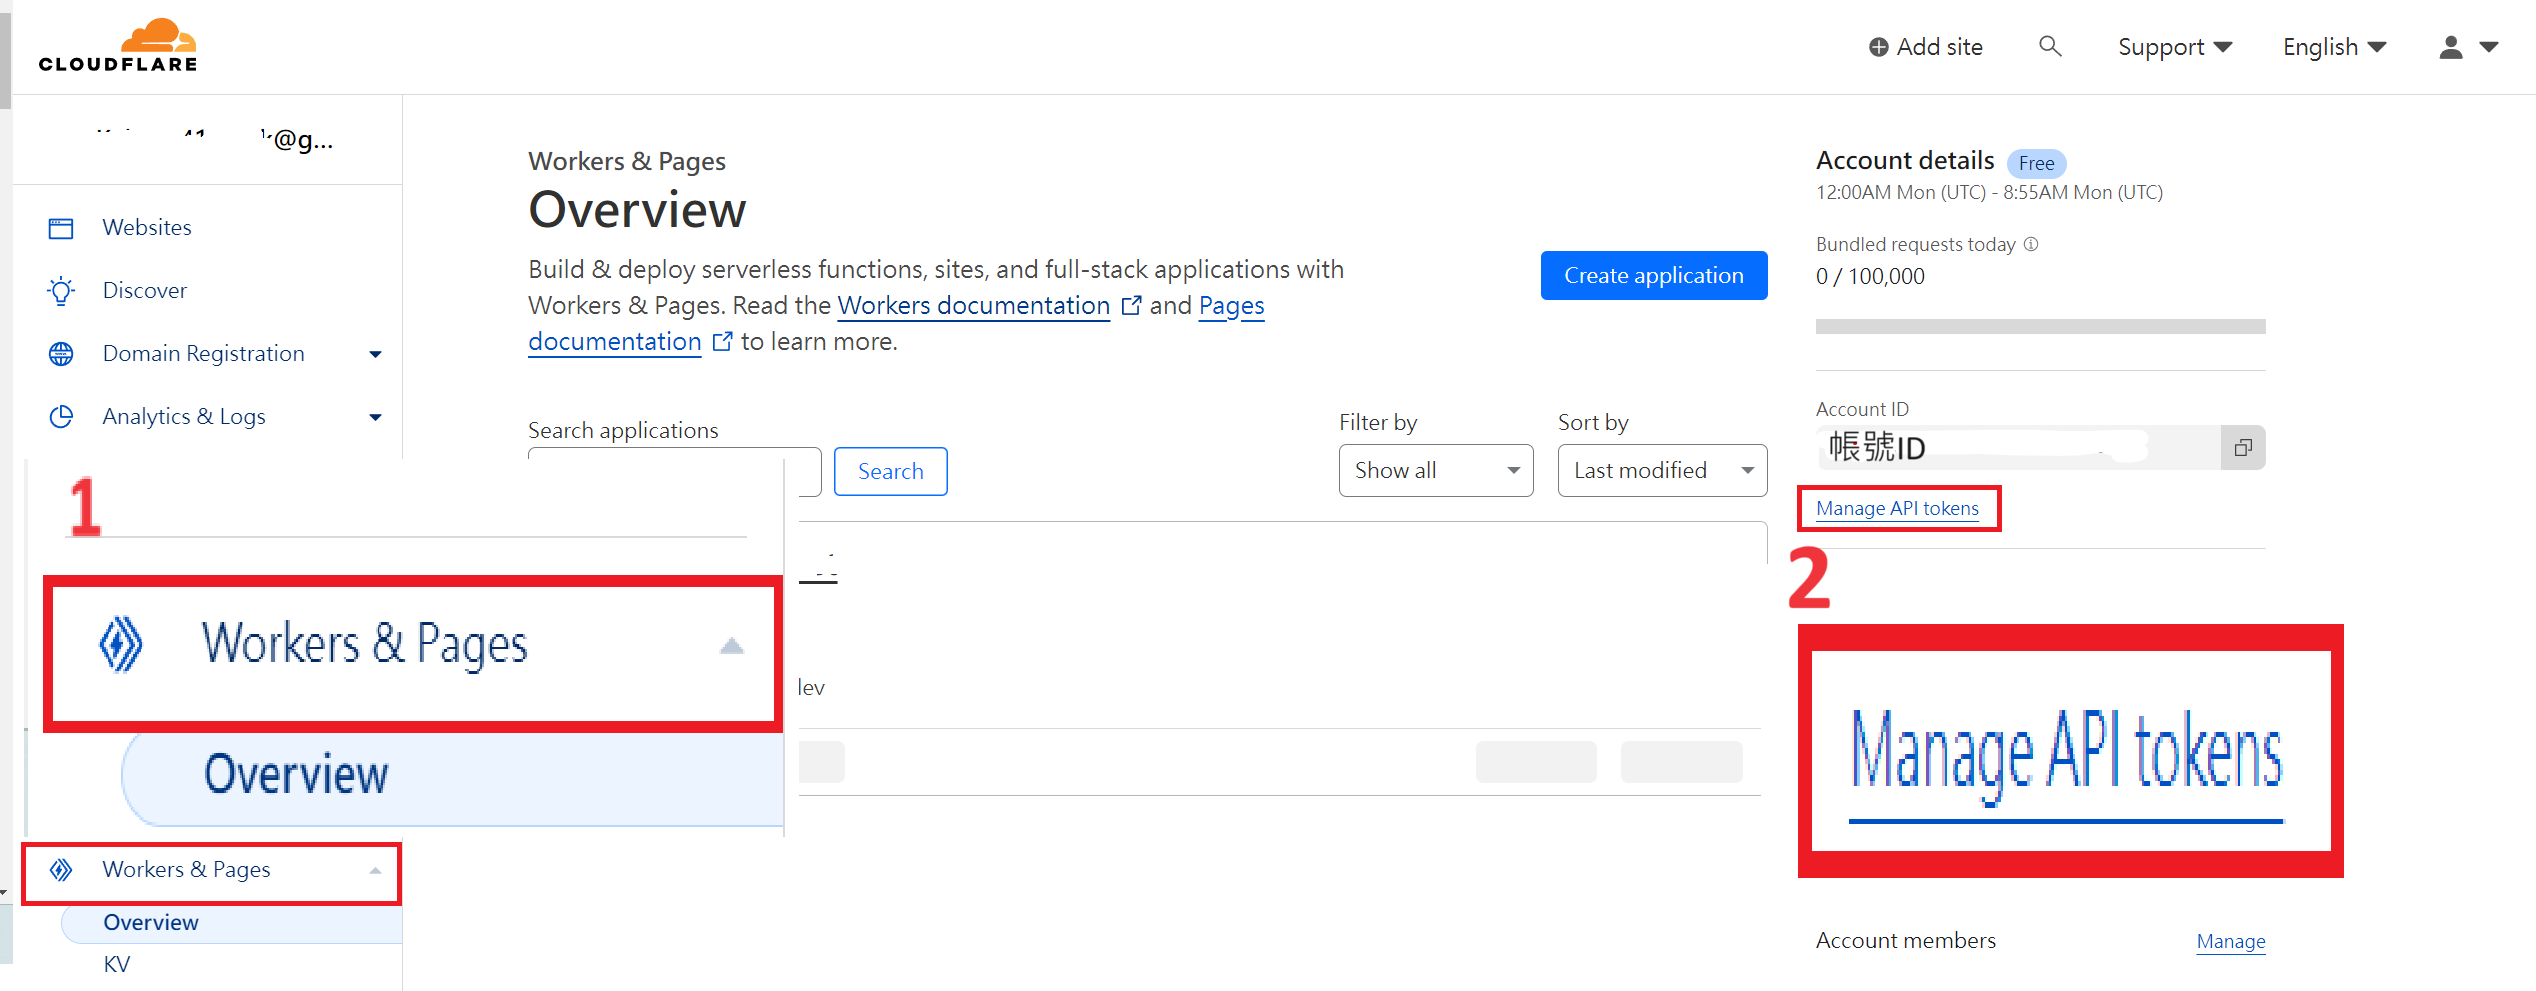
- 點擊藍色按鈕
Create Token前往建立API Token的頁面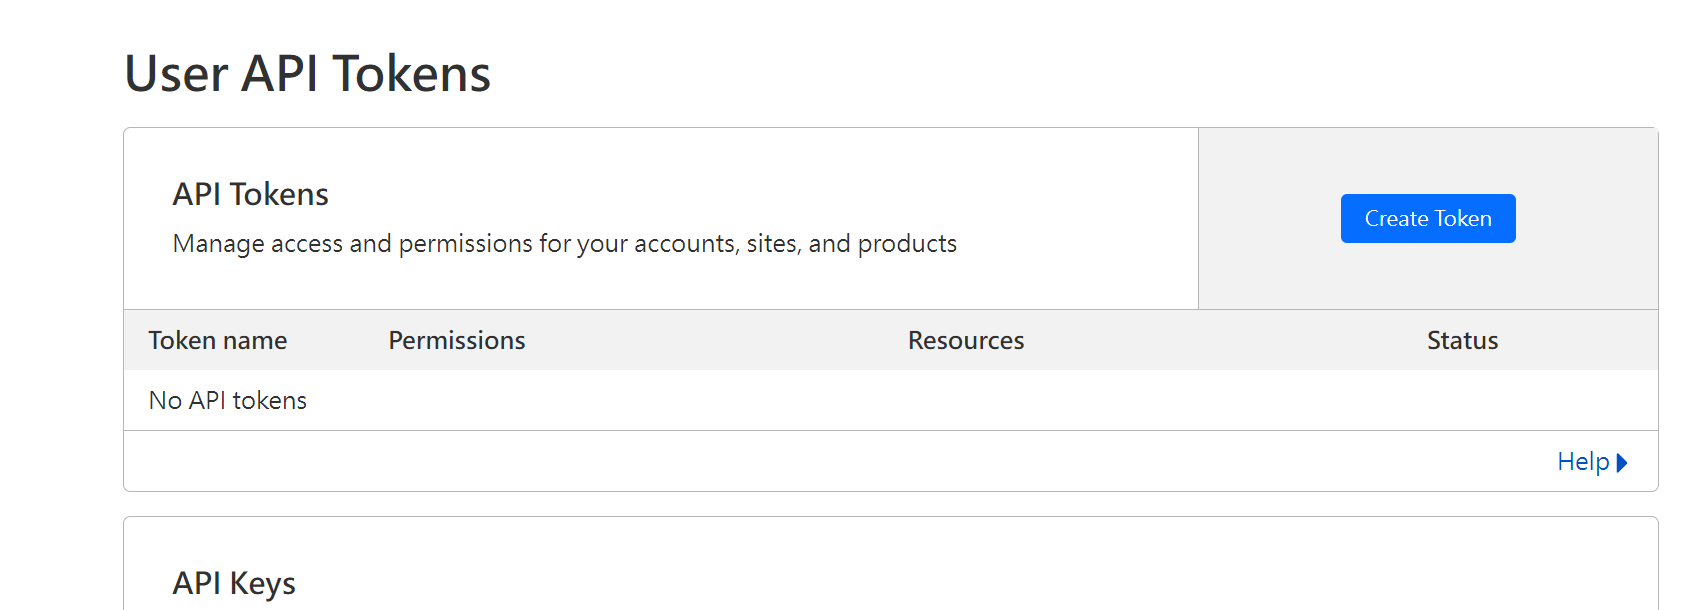
- 來到API Tokens頁面後點選Create Custom Token旁的藍色按鈕
Get Started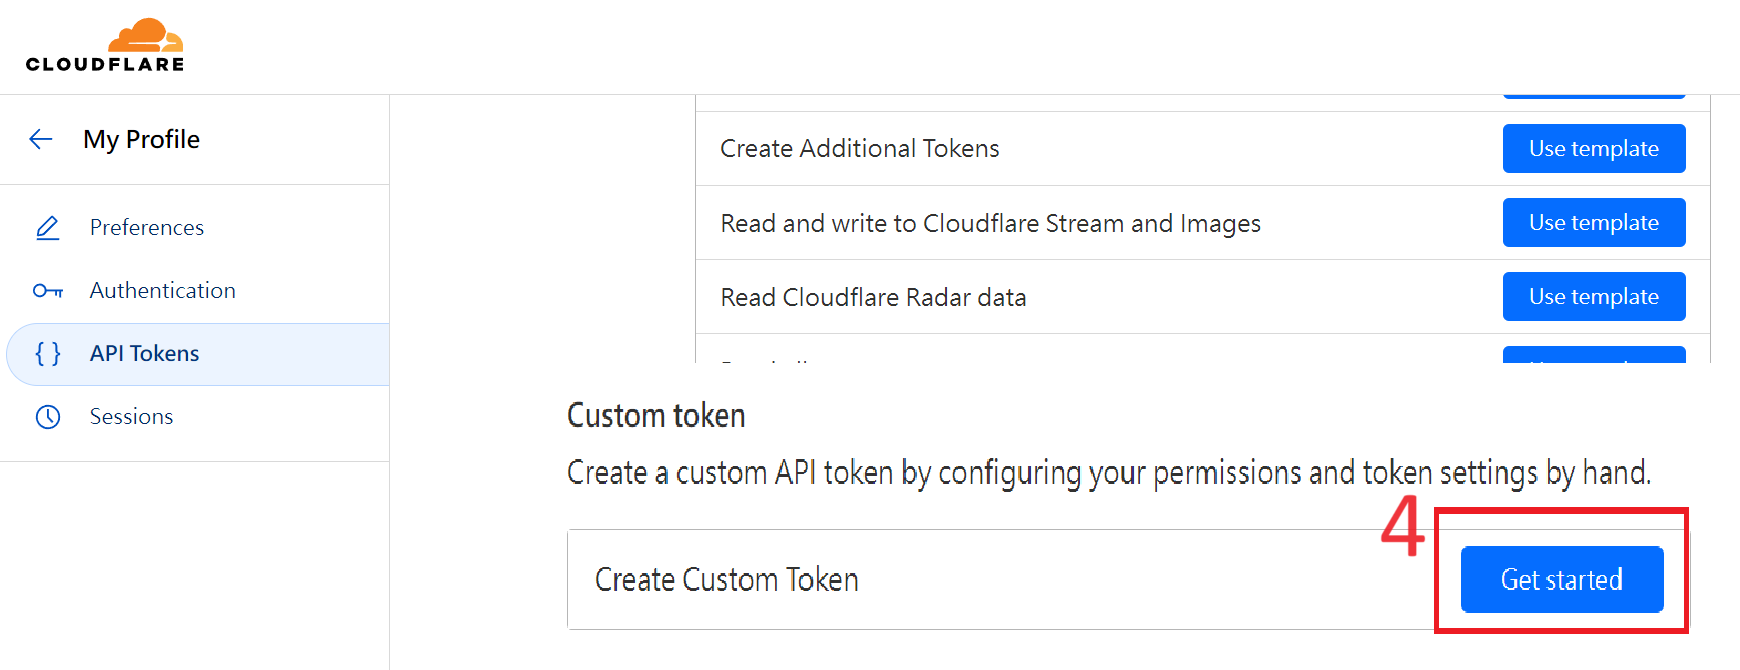
- 填寫
Token name這邊幫Token取名為Deploy with github - 在
Permisions區塊點選Add新增一個權限Account/Cloudflare/Edit,接著畫面拉到最下方點擊藍色按鈕Continue to summary。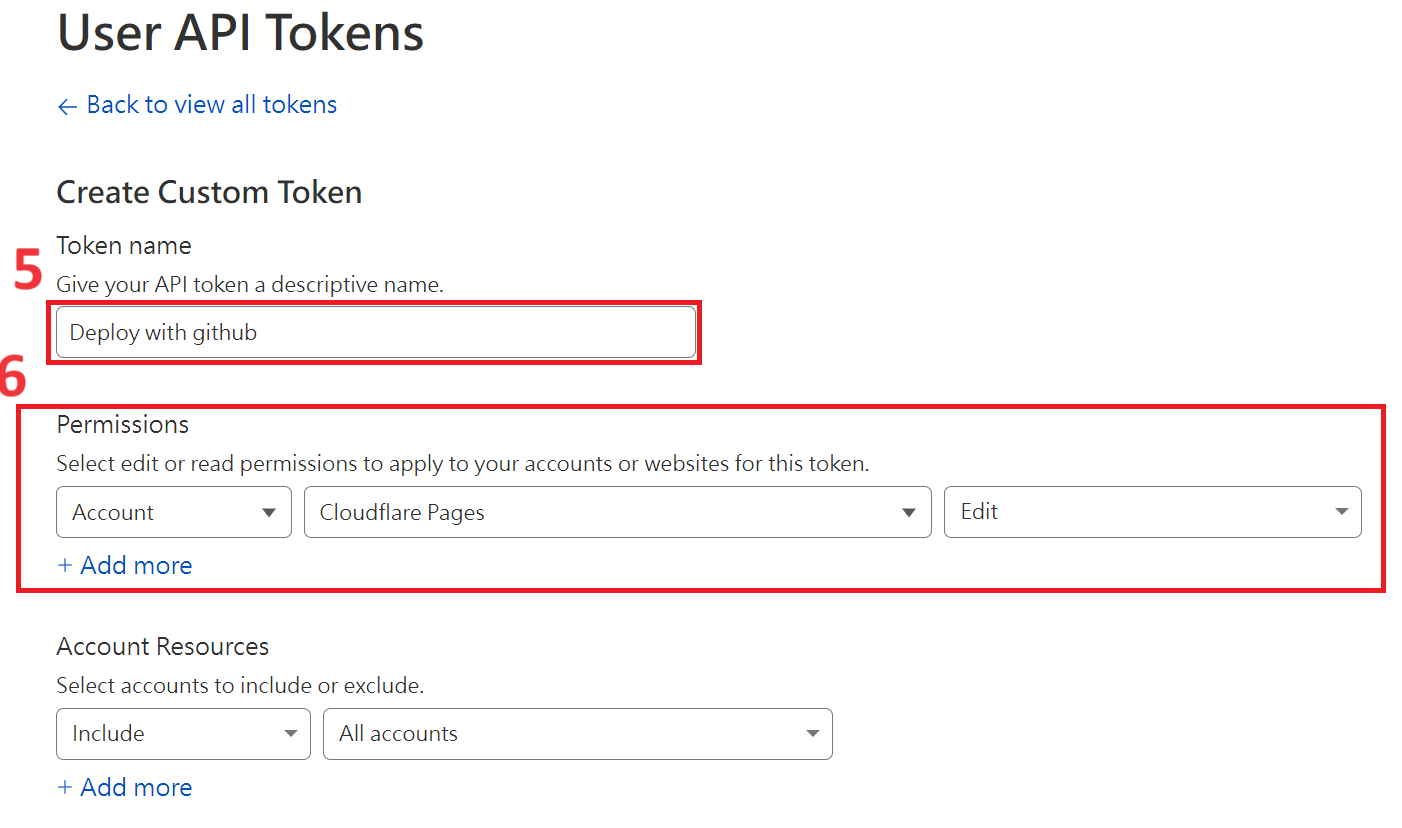
- 此時
Cloudflare會讓你再次確認權限,只需要注意畫面上有出現All accounts - Cloudflare Pages:Edit這個,沒問題就繼續點擊藍色按鈕Create Token。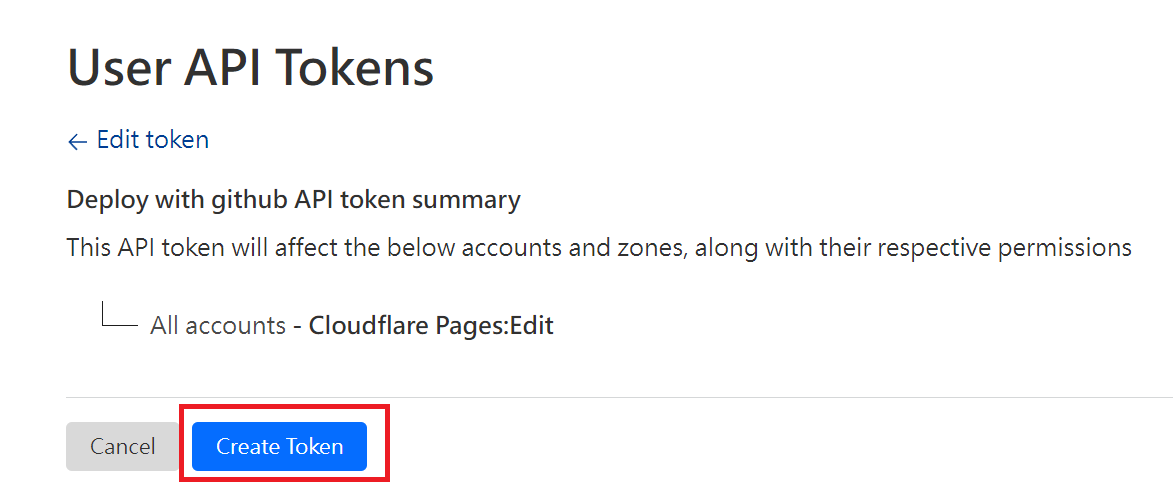
- 至此
Cloudflare API Token建立成功,點擊按鈕Copy先複製起來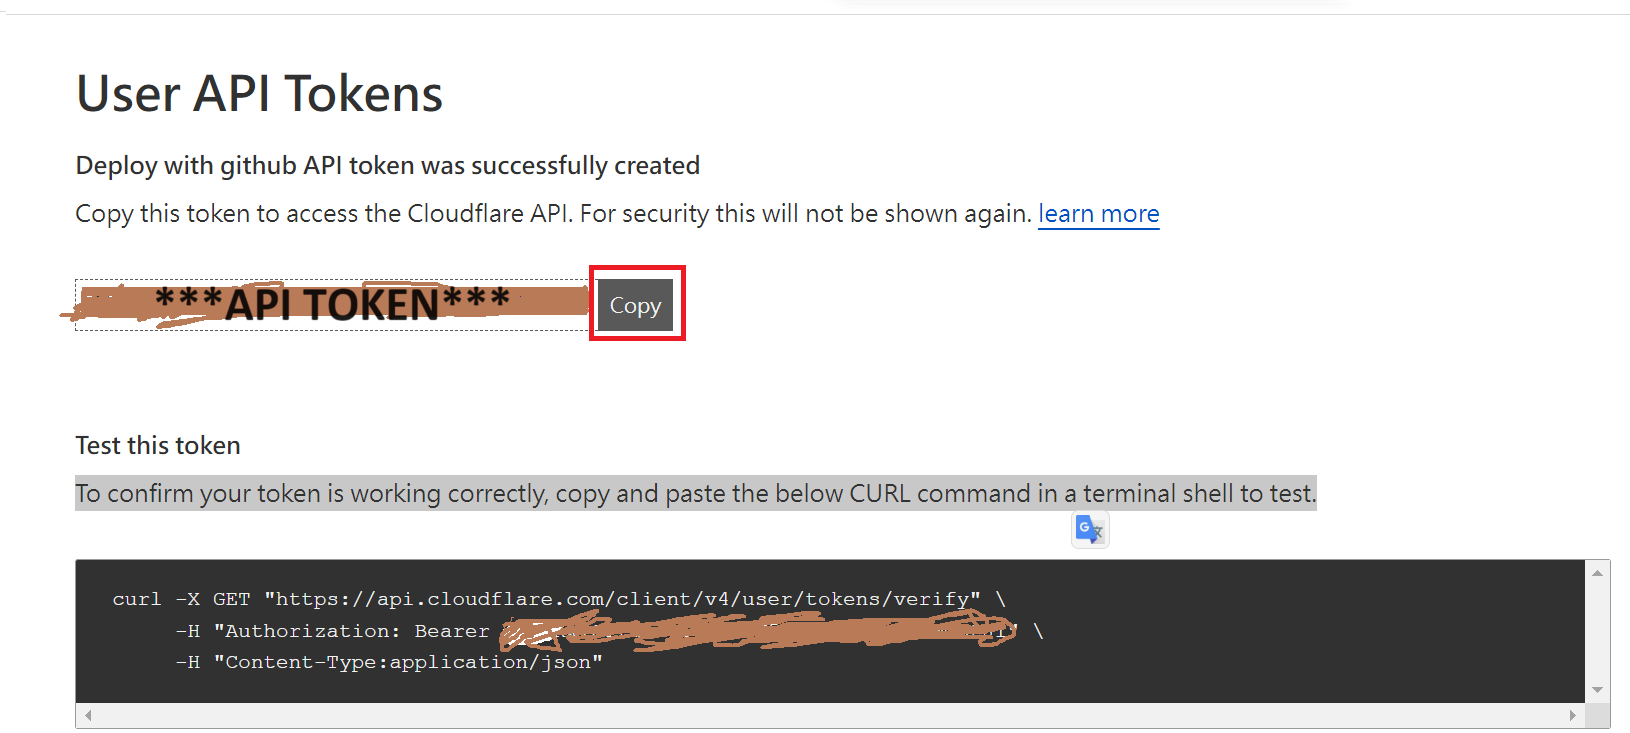
第2步 將Cloudflare API Token設置於Github Repo
此處Github儲存庫是kabuto412rock/ithelp-pokergame
- 前往
Github的儲存庫點擊Setting->Secrets and Variables->Actions - 來到
Actions secrets and variables頁面後點擊綠色按鈕New Repository secret- 設置新的密鑰
CLOUDFLARE_API_TOKEN填入先前取得的Cloudflare API Token - 設置新的密鑰
CLOUDFLARE_ACCOUNT_ID填入在Cloudflare的儀表板右手邊Manage API tokens上方的Account ID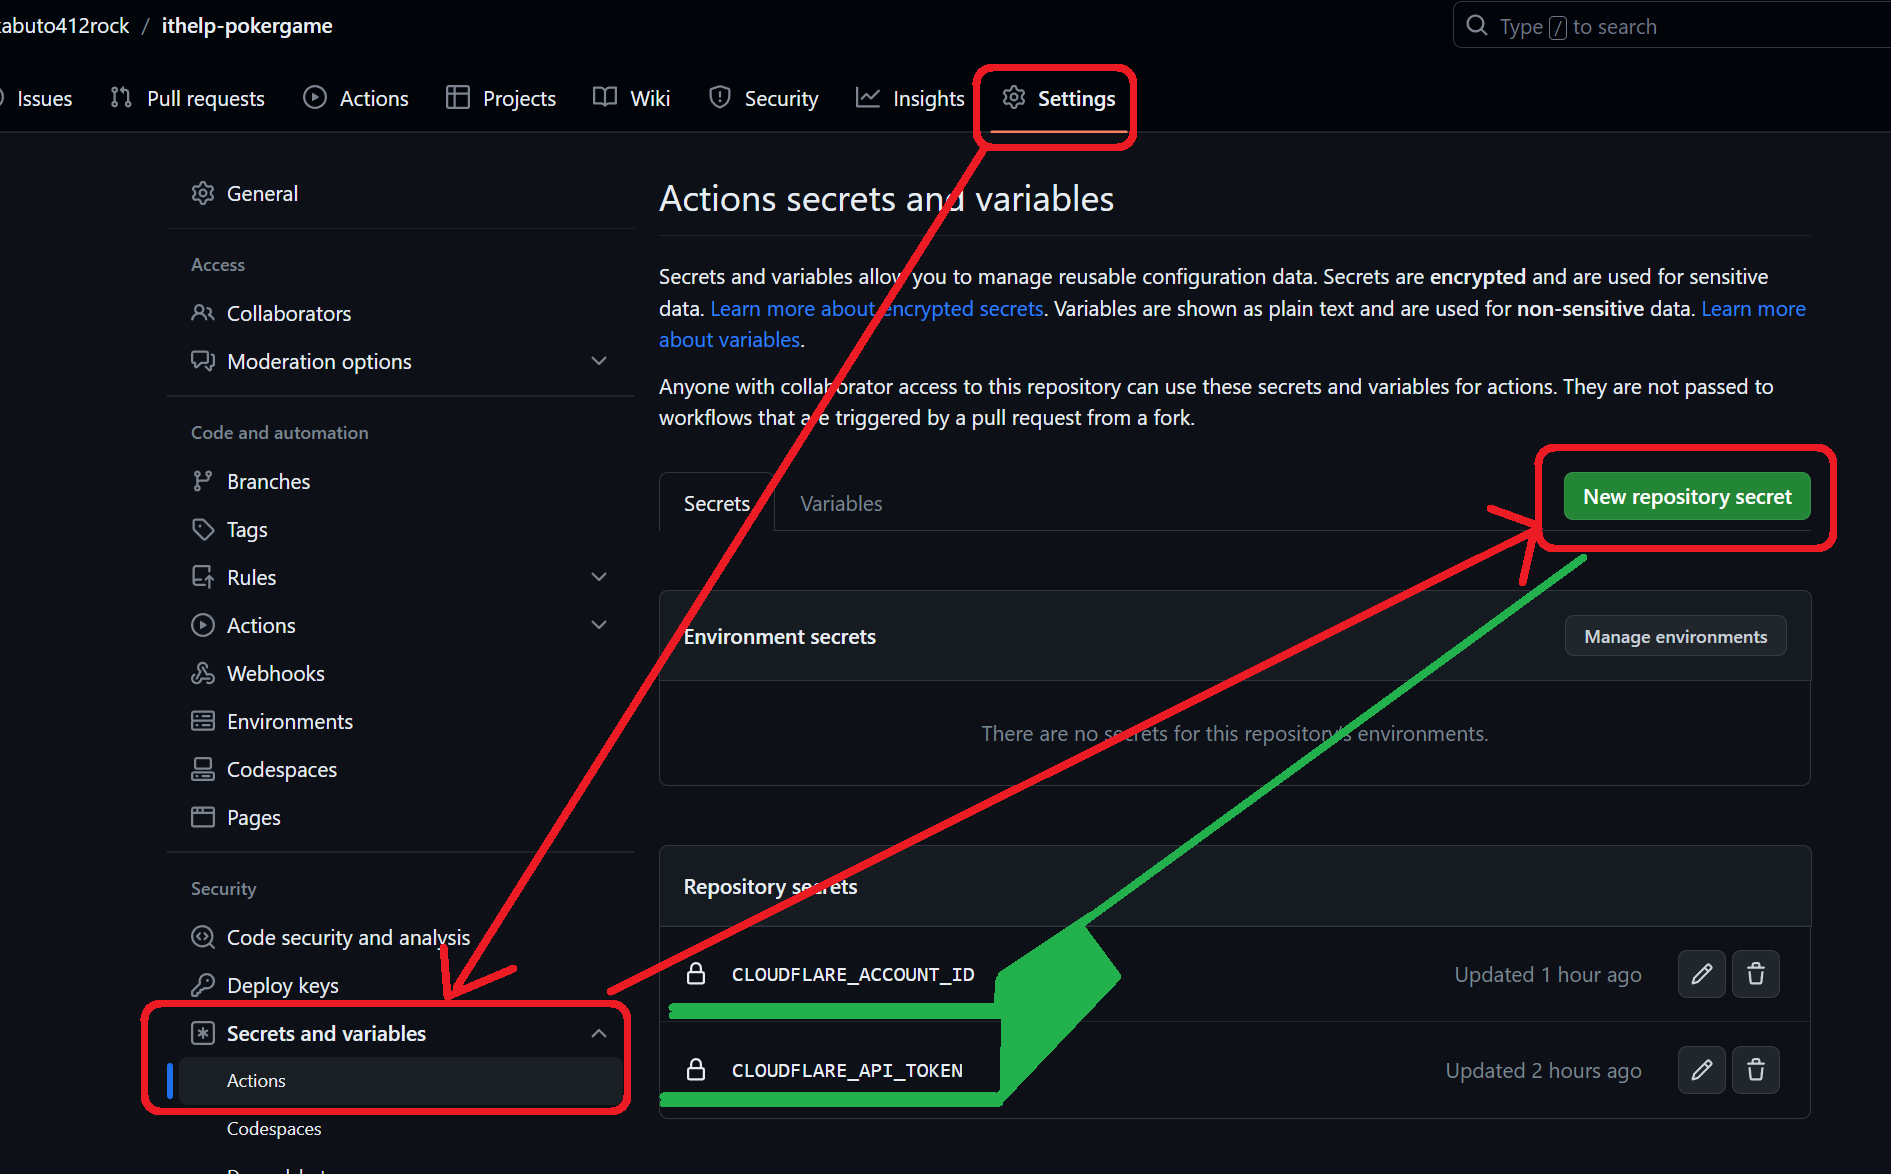
- 設置新的密鑰
- 在分支
main加入檔案.github/workflows/publish.yml定義Github Action
這邊要注意的是
projectName對應填寫的專案名稱ithelp-game-test是我在第0步已經預先建立的專案名稱,若亂填的話Github Action自動執行時將會在步驟Publish to Cloudflare Pages出錯。
on: [push]

jobs:
  publish:
    runs-on: ubuntu-latest
    permissions:
      contents: read
      deployments: write
    name: Publish to Cloudflare Pages
    steps:
      - name: Checkout
        uses: actions/checkout@v3

      # Run a build step here if your project requires
      - name: Install and Build 🔧 # This example project is built using npm and outputs the result to the 'build' folder. Replace with the commands required to build your project, or remove this step entirely if your site is pre-built.
        run: |
          npm ci
          npm run build

      - name: Publish to Cloudflare Pages
        uses: cloudflare/pages-action@v1
        with:
          apiToken: ${{ secrets.CLOUDFLARE_API_TOKEN }}
          accountId: ${{ secrets.CLOUDFLARE_ACCOUNT_ID }}
          projectName: ithelp-game-test
          directory: dist
          # Optional: Enable this if you want to have GitHub Deployments triggered
          gitHubToken: ${{ secrets.GITHUB_TOKEN }}
          # Optional: Switch what branch you are publishing to.
          # By default this will be the branch which triggered this workflow
          branch: main
          # Optional: Change the Wrangler version, allows you to point to a specific version or a tag such as `beta`
          wranglerVersion: '3'
第3步 在Cloudflare儀表板確認成功部屬
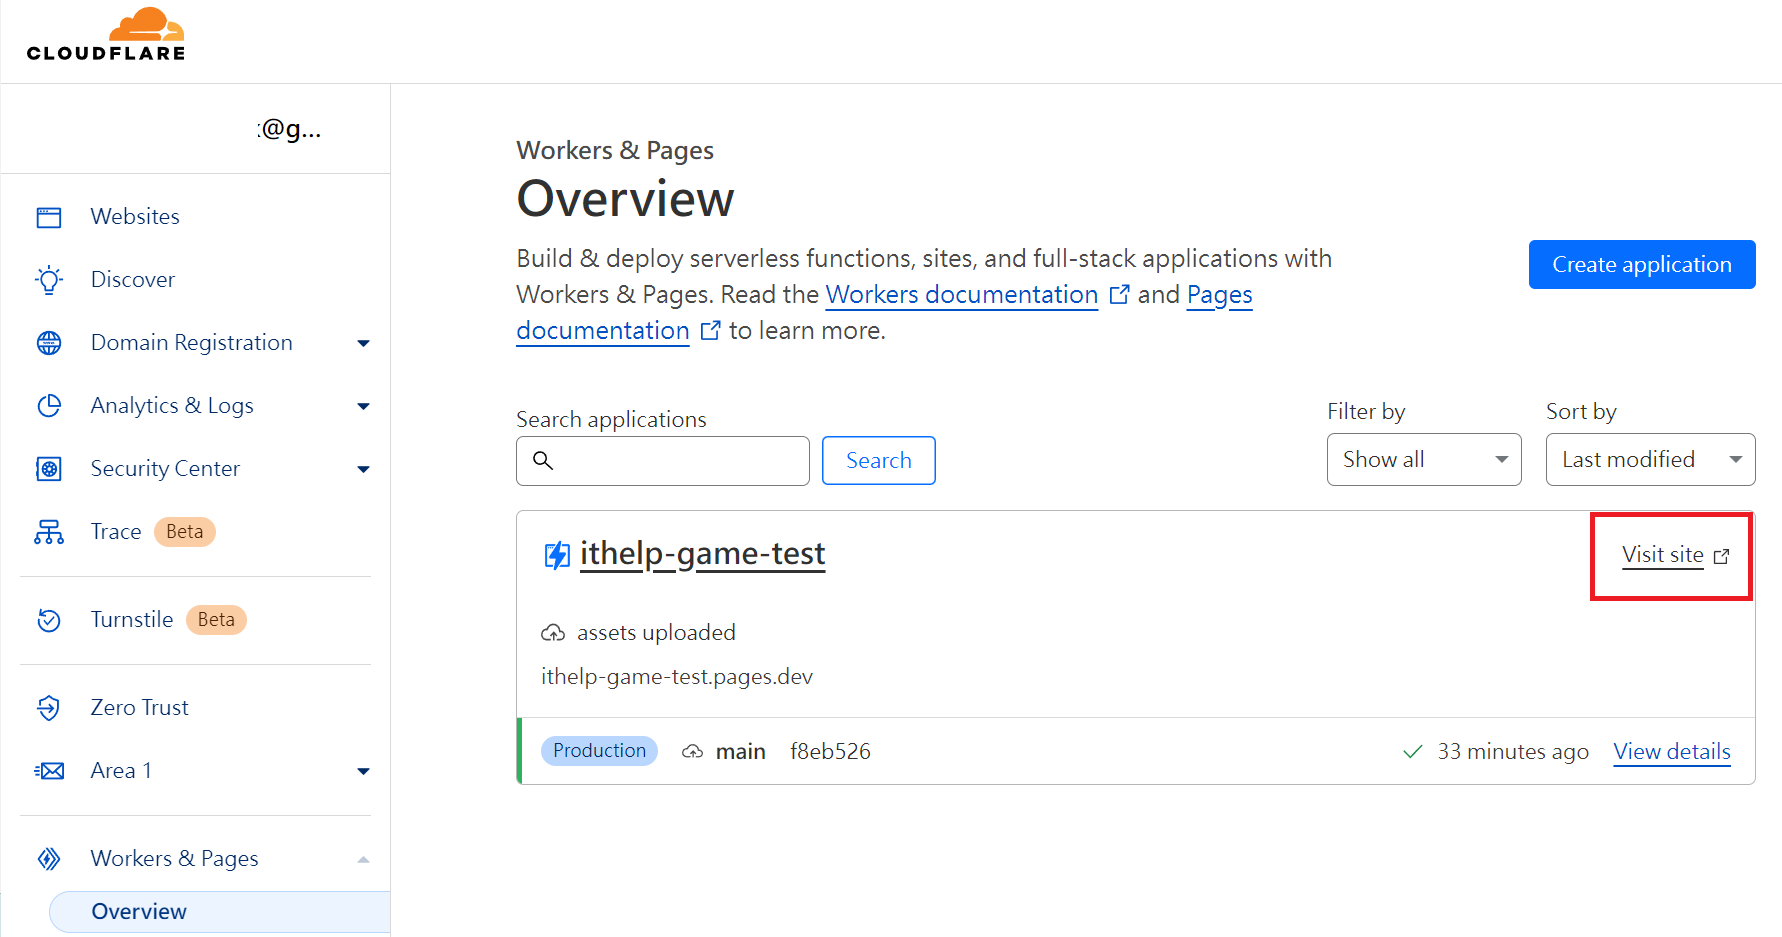
回到儀表板後可以注意到專案ithelp-game-test出現 visit site,就代表Github Action已經正常部屬上環境囉。
30天小結
今天是我參加鐵人賽的第30天最後使用Cloudflare Page搭配Github Action把網頁發布出去並寫成一篇文章。
這30天對比他人的文章的知識含量遠遠不夠而且賽前又沒屯稿,中途也曾苦悶想要放棄比賽,幸好堅持寫文章不中斷,或許這就是一種鐵人精神吧!
『在學習和創造之間不斷翻滾成長又分享過程給大家』
程式碼: https://github.com/kabuto412rock/ithelp-pokergame/tree/day30
參考文件
